How to crop a photo into a circle for your profile picture
Circular photos are everywhere: profiles, email signatures, presentations, websites. But there are two different cases, and it helps to know which one is yours before you start. This guide covers both in Galion Photo, inside your browser and without the photo leaving your device.
Before you start: square or circle?
For a social media profile picture (Instagram, WhatsApp, YouTube, X, LinkedIn…) you need a well-framed square: the network itself shows it as a circle. If you upload a PNG with transparent corners, some networks fill them with white or black.
For your own designs (a thumbnail, a website, a presentation or a sticker) you need a circle with a transparent background that you can place on top of something else. Steps 1 to 4 work for both cases; from step 5 on, only for the circle.
Step by step
- Open galiontoon.com, choose Galion Photo and open your photo with File → Open….
- Choose the Crop tool (C key). In the top bar, under Ratio pick 1:1 (square).
- Drag the box over the face, leaving some room around the head, and click Apply (or press Enter).
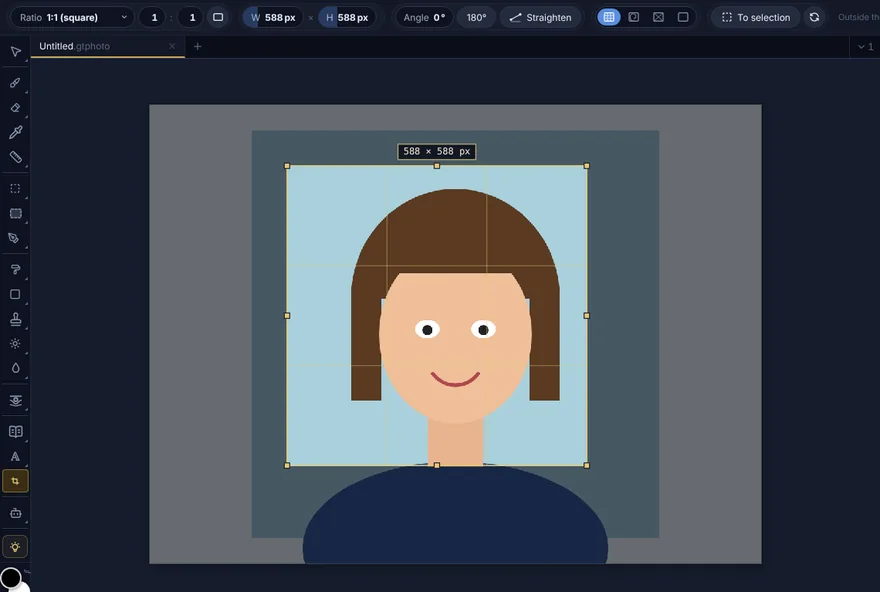
Crop with the 1:1 ratio: a perfect square around the face. - If you only want the profile picture, you are done: export with File → Quick export → JPG. The social network will show it as a circle.
- For a circle with a transparent background, choose the Mask from shape tool (K key). Press and hold its icon and, in the group, choose Elliptical mask.
- Drag from one corner to the opposite one while holding Shift: you get a perfect circle. GalionToon turns it into a mask, so everything outside is hidden without being deleted.
- To reposition the circle, drag it. Right after creating it you are working on the Frame (mask) level: the circle moves and the photo stays still. Press Esc to go back to moving the whole thing.
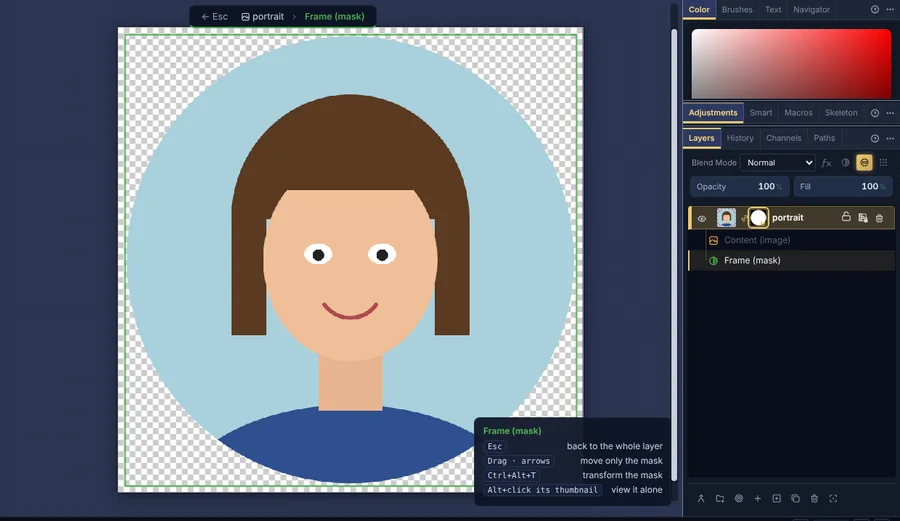
Elliptical mask with Shift: a perfect circle, transparent corners and the photo intact underneath. - Export with File → Quick export → PNG: the corners stay transparent. Do not use JPG for this, because it has no transparency and the corners would turn white.
What size to use
For a profile picture, a square of 400 × 400 pixels or more is enough on almost every network. If your photo has more resolution, crop it without shrinking it: the network will adapt it. If you start a design from scratch, File → New…, in the Social media tab, has the Profile photo template at 400 × 400.
For designs, think about the size it will be seen at. A circle that will appear small in a thumbnail does not need thousands of pixels; one that is going to be printed does. You can use it, for example, in a YouTube thumbnail.
Tips for a good profile picture
- Keep the eyes roughly in the top third of the circle. That way the face is centred without cutting off the forehead.
- Look for light from the front or the side, never from behind. In a small circle, a dark face cannot be recognised.
- A plain background helps a lot. If yours is busy, remove it first with Remove background… and put a colour behind before cropping.
- Save the square crop with File → Save. It will work for every network and for making the circle whenever you need it.
Common problems
- The circle comes out oval. Release the mouse while still holding Shift: if you let go of Shift first, the shape stops being a circle. Starting from the square crop in step 3 also helps.
- The corners come out white or black. You exported as JPG, or the social network fills in the transparency. For designs, export as PNG; for networks, upload the square without the mask.
- The social network cuts off the face. It only shows the circle that fits inside the square, so the corners disappear. Centre the face and leave room around the head when cropping.
- The edge of the circle looks jagged. Soften it: open Remove background… and click Feather edge; it works on the mask you already have. The guide How to remove the background from a photo explains those settings.
- The photo moved instead of the circle. You were moving the whole thing. Undo with Ctrl+Z, click the mask thumbnail in the Layers panel and drag again.
Common questions
Does my photo get uploaded anywhere? No. It is cropped in your browser and never sent to a server.
Is it free? Yes. GalionToon is free, with no account and no watermark.
Can I go back and remove the circle? Yes. The whole photo is still there under the mask: use Delete mask, in Layer → Layer mask, or undo with Ctrl+Z.
Can I use other shapes? Yes. Mask from shape also has a rectangular version and a lasso for drawing a free shape. With Shift, the rectangular one gives a perfect square.
What size is the profile photo template? 400 × 400 pixels, in File → New…, Social media tab. If your photo is bigger, there is no need to shrink it.
More guides
- How to make your first manga page in your browser6 min read
- How to make a vertical webtoon to read on a phone5 min read
- Speech balloons and speed lines for your comic5 min read
- Comic and manga page sizes: B5, A4, comic book and webtoon5 min read
- How to import your custom brushes4 min read
- How to remove the background from a photo in your browser5 min read
- How to open and save a PSD file in your browser4 min read
- How to make your first animated pixel art3 min read
- How to add subtitles to a video in your browser3 min read
- How to edit your first video in your browser4 min read
- How to make a YouTube thumbnail for free in your browser4 min read
- How to put text on a photo so it can be read4 min read
- Layer masks: what they are and how to use them4 min read
- How to resize an image for social media without losing quality4 min read
- How to make an Instagram post step by step4 min read
- How to create a sprite sheet for a video game4 min read
- Free fonts for commercial designs: how to choose them5 min read
- How to animate a character with bones in Galion Rig4 min read
- How to convert a drawing or a logo into a vector (SVG)4 min read