How to resize an image for social media without losing quality
You upload a photo that looks perfect on your phone and, on the social network, it appears blurry, cropped where you did not want it or with bars on the sides. It is almost never the photo’s fault: it simply did not have the proportion or the size that network expects. This guide explains how to prepare it in Galion Photo so it arrives the way you intended.
Why quality gets lost
- Enlarging adds no detail. If a 600-pixel photo is stretched to 1080, the browser has to invent the missing pixels, and it shows.
- The proportion does not match. If the image does not have the shape the network asks for, the network crops it its own way or adds bars.
- The network compresses again. Images larger than recommended are shrunk and recompressed on upload; if they already have the right size, they are touched less.
- Saving as JPG many times. Every JPG save loses a little. Work on the original and export once, at the end.
Recommended sizes
These are the sizes of GalionToon’s templates, in File → New…, Social media tab. Networks change their recommendations from time to time, but an image at these sizes looks good on all of them.
- Instagram, portrait post: 1080 × 1350 (4:5). Square: 1080 × 1080 (1:1). Note: since January 2025, the Instagram profile grid crops posts to 3:4, so on a 4:5 image keep faces and text away from the side edges (How to make an Instagram post explains it).
- Story, Reel or TikTok: 1080 × 1920 (9:16).
- YouTube, thumbnail: 1280 × 720 (16:9). Channel banner: 2560 × 1440.
- Facebook, shared link: 1200 × 630. Cover: 851 × 315.
- X, post: 1600 × 900. Header: 1500 × 500.
- LinkedIn, post: 1200 × 1200. Pinterest, pin: 1000 × 1500.
- Profile photo: 400 × 400 or more.
Step by step: a photo for Instagram (1080 × 1350)
- Open galiontoon.com, choose Galion Photo and open the original photo, the biggest you have, with File → Open….
- Choose Crop (C key). In the top bar, under Ratio pick 5:4 and click the orientation button next to it (or press X): the box turns portrait, 4:5. Adjust the box with its handles; dragging inside it moves it so you can frame the shot. Click Apply.
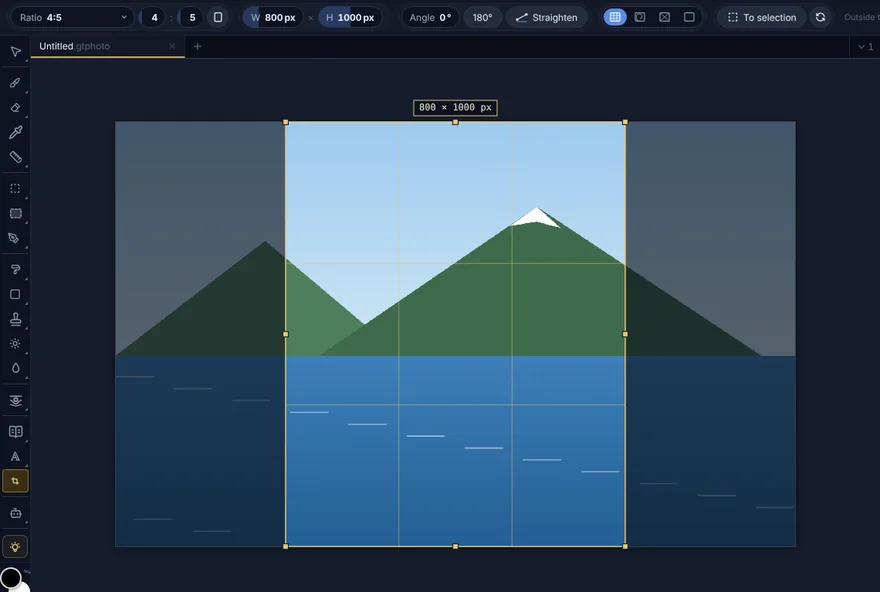
Crop with the 4:5 ratio: the exact shape of an Instagram portrait post. - Open Image → Image size..., keep Lock aspect ratio ticked and type 1080 in Width: the height sets itself to 1350. Click Apply. Only do this if your photo is bigger; if it is smaller, do not enlarge it.
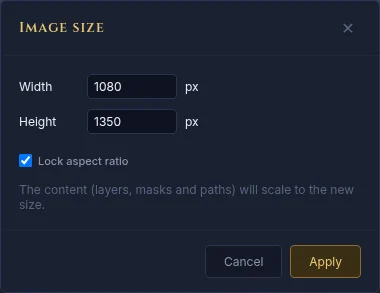
Image → Image size...: with the ratio locked, typing the width is enough. - Open File → Export As... and choose the format: JPEG for photos, PNG for images with text, logos or transparency. Below the preview you can see the final size and the approximate file weight.
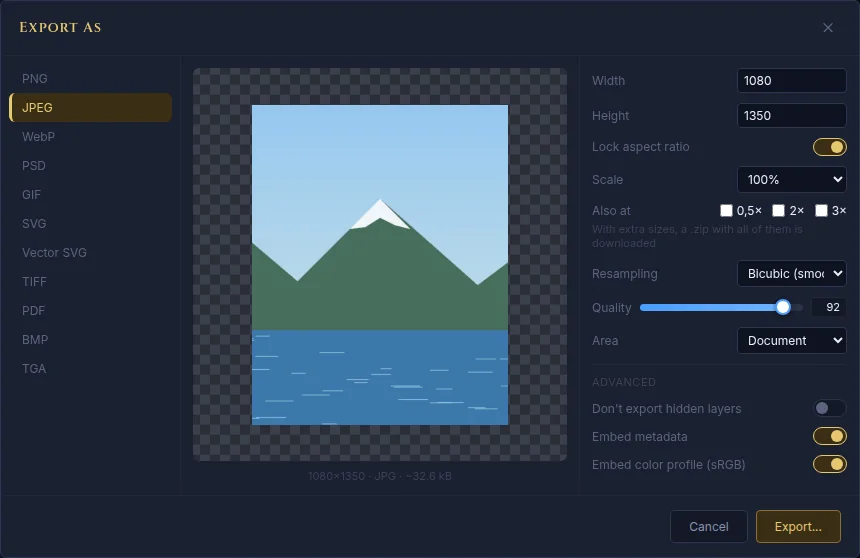
Export As: format, final size and estimated weight before downloading. - Click Export... and upload that file to the network.
Another way: resize only when exporting
If you do not want to change your document, change the size in the Export As window itself: the Width and Height fields (or Scale) only affect the downloaded file. Under Also at you can tick 0.5×, 2× or 3× to download several sizes at once in a .zip.
Resampling decides how the new pixels are calculated. Bicubic (smooth) is the right one for photos. Nearest neighbor is for pixel art, which should keep hard edges; the guide How to make a pixel art animation covers it.
Common problems
- It looks blurry on the network. The original photo was smaller than the final size and was enlarged, or the network recompressed it because it was much bigger. Start from the biggest original you have and export at the exact size.
- The network crops the photo where I do not want it. The proportion was not the network’s. Crop it yourself first with the right proportion, so you decide what stays in.
- White or black borders appear. That is the network filling the difference in proportion. If you want to show the whole photo without cropping it, use Image → Canvas size... to add the right margin yourself.
- The text looks blurry. Export as PNG and avoid shrinking an image with small lettering a lot. If you add the text in GalionToon, do it after resizing.
- The file is too heavy. In JPEG, lower the Quality to 80–85: the difference is hardly visible and the file weighs much less. WebP weighs even less, although not every network accepts it.
Common questions
Does shrinking a photo lose quality? Not noticeably: when shrinking there are pixels to spare and bicubic resampling blends them smoothly. What does lose quality is enlarging.
Which format should I use? JPEG for photos, PNG for graphics, text or transparency, and WebP if the network or your website supports it and you want lighter files.
Can I export several sizes at once? Yes. In Export As, tick 0.5×, 2× or 3× under Also at and a .zip with all of them is downloaded.
Is my original photo changed? No. GalionToon works on a copy inside the browser; the file on your device does not change. What you export is a new file.
What if I start a design from scratch? Use the template with the right size directly, in File → New…, Social media tab. The guide How to make a YouTube thumbnail does it step by step.
More guides
- How to edit a photo online for free, without signing up5 min read
- How to make your first manga page in your browser6 min read
- How to make a vertical webtoon to read on a phone5 min read
- Speech balloons and speed lines for your comic5 min read
- Comic and manga page sizes: B5, A4, comic book and webtoon5 min read
- How to import your custom brushes4 min read
- How to remove the background from a photo in your browser5 min read
- How to open and save a PSD file in your browser4 min read
- How to make your first animated pixel art3 min read
- How to add subtitles to a video in your browser3 min read
- How to edit your first video in your browser4 min read
- How to make a YouTube thumbnail for free in your browser4 min read
- How to crop a photo into a circle for your profile picture4 min read
- How to put text on a photo so it can be read4 min read
- Layer masks: what they are and how to use them4 min read
- How to make an Instagram post step by step4 min read
- How to create a sprite sheet for a video game4 min read
- Free fonts for commercial designs: how to choose them5 min read
- How to animate a character with bones in Galion Rig4 min read
- How to convert a drawing or a logo into a vector (SVG)4 min read